background

Showing posts with label Halloween. Show all posts

Saturday, October 25, 2014

Zombie Themed Party


With the recent start of the new season of Walking Dead, we decided to throw a premier party with some friends. I put together a fun spread of zombie themed finger foods and we asked our guests to dress as one of the characters from the series. It turned out great and the premier was a thriller!


Here are a few fun ideas if you need have a Halloween party or office potluck coming up this week. Hope you enjoy!


Moldy Cheeseball


This is a fast way to add a little Halloween flair. Make your favorite cheeseball recipe, or even pick up one from the store. Roll it in green herbs to give it a moldy look. I used parsley flakes so the flavor would not distract from the flavor of the cheese. Serve with crackers or veggie sticks and decorate the plate with plastic spiders or insects to add to the effect.

Cured Epidermis


Create an eerie display with these cured pieces of proscuitto. I found this idea from Martha Stewart. The result is a jerky-like meat with a great salty flavor. 

Preheat your oven to 400 degrees. Lay slices of proscuitto - mine were about 1/4 inch thick - in a single layer on a foil lined baking sheet. Bake for 15-20 minutes until stiff and crispy, turning over once.

Line another baking sheet with paper towels. Set wire cooling rack over paper towels. Remove slices from oven and transfer to cooling rack to drain grease.

Serve on a tray or plate with a butcher knife for extra spooky effect.

Bloodshot Eyeballs


This is a simple option for a creepy party food. Prepare deviled eggs as you normally would. Use a slice of green olives with pimento for the pupils. Dip a toothpick in red food coloring and draw lines to create bloodshot veins.

Intestine Sausages


Warm cocktail sausages on low heat in a crockpot. Serve with a side of BBQ sauce or spicy mustard.

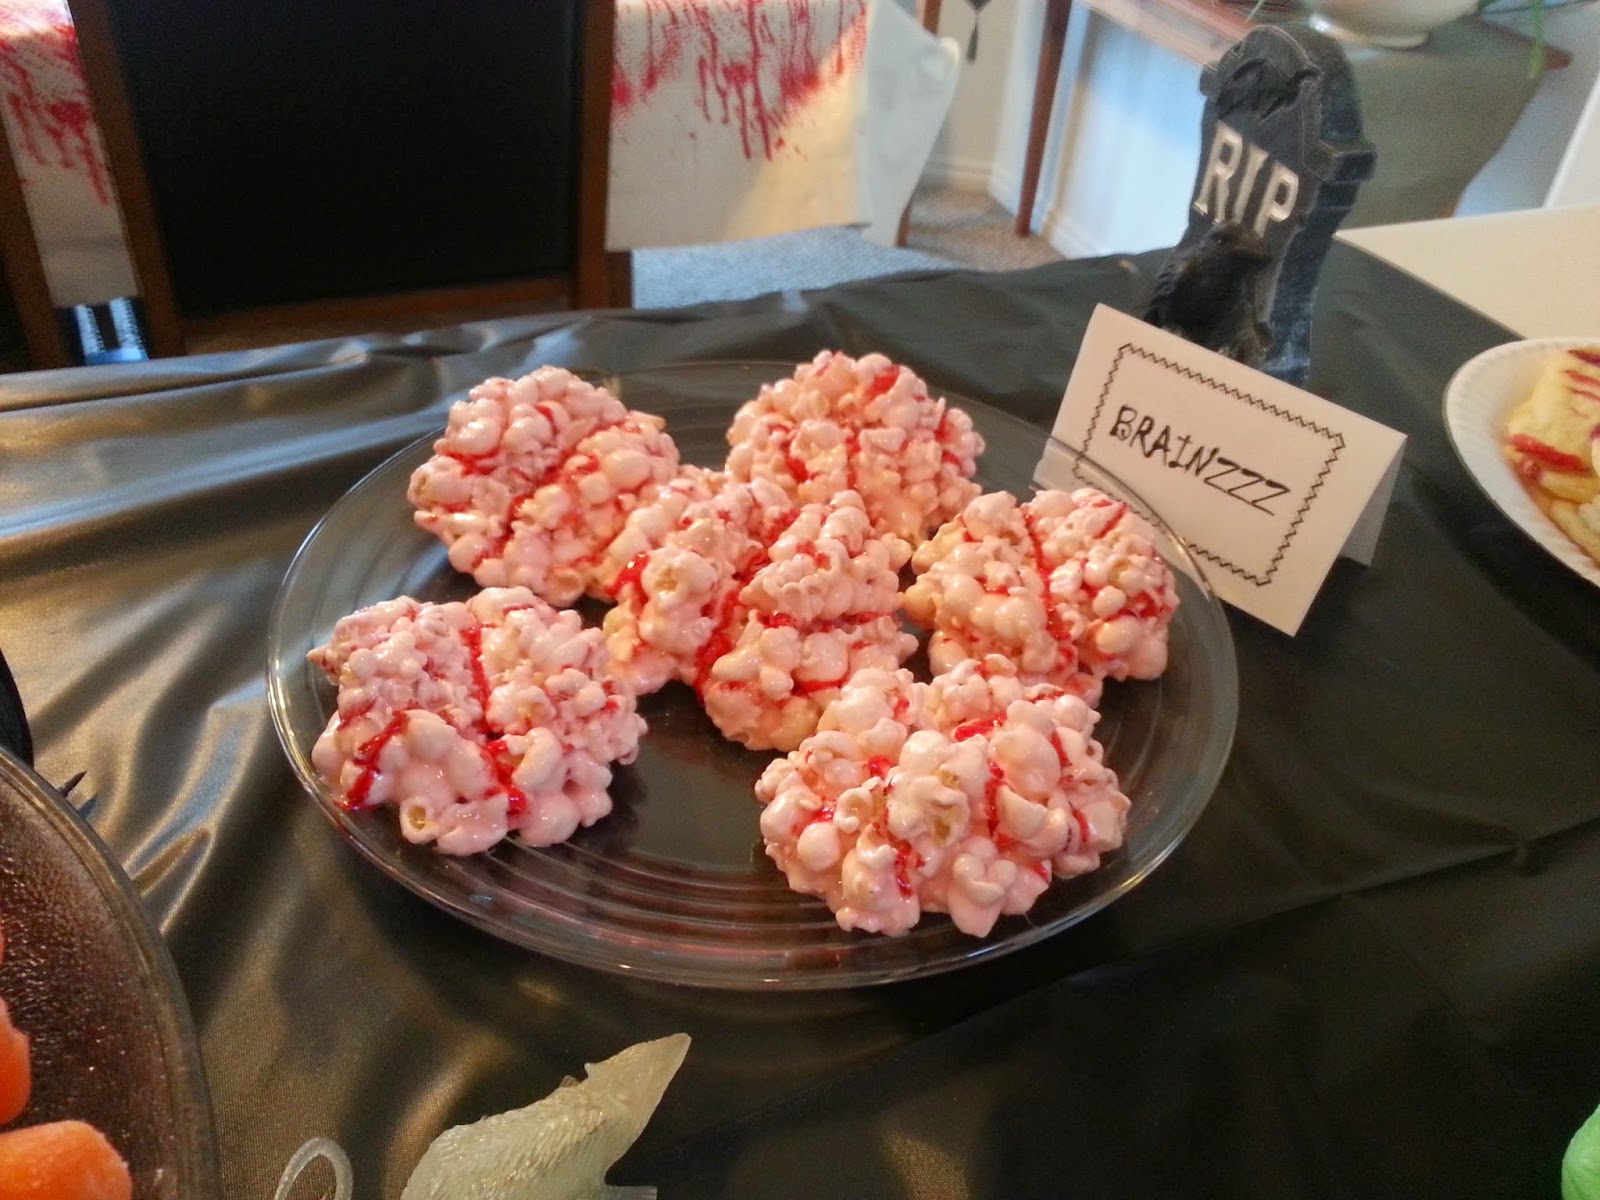
Zombie Brain Popcorn Balls


This is a recipe I posted last year. These are so fun and always impress. You can find the recipe and instructions here.

Zombie Fingers


These are yummy shortbread cookies made to look like zombie fingers. By adding a couple drops of green food coloring to your cookie dough, you could make witch's fingers instead. I adapted my recipe from one I found on Food.com

Ingredients:
1 large egg + 1 egg white
1/4 teaspoon vanilla
1/4  cup butter, at room temperature
1/4 cup powdered sugar
2-1/2 Tablespoons granulated sugar
pinch of salt
3/4 cup flour
18-20 pecan pieces or blanched almonds
red food coloring
green food coloring

Directions:
Preheat your oven to 350 degrees. Spray a large baking sheet with non-stick spray. In small bowl, whisk together 1 whole egg and vanilla. Set aside. 

In large mixing bowl, combine butter, powdered sugar, granulated sugar and salt. Mix with hand mixer (or paddle attachment of electric mixer) on medium speed until well combined. Add egg/vanilla mixture and beat until smooth, about 2 minutes. Add the flour and mix on low speed until just incorporated. Wrap the dough in plastic and chill for 20-30 minutes, until firm.

Working with rounded tablespoons of dough, roll each piece on a floured surface into a finger shape, 3-4 inched long. The dough will expand when cooked, so make your fingers skinnier than you want them to be. Pinch the dough in 2 places to form knuckles. Make them large and uneven for a creepier look. Score each knuckle lightly 3 times with a small knife. Place on prepared baking sheet, allowing room for expansion between fingers. Repeat process until all dough is used. Should make 18-20 cookies. 

In small bowl, beat 1 egg white with 2 drops of green food coloring. Lightly brush all cookies with egg white mixture. Press pecans onto end of each finger to form finger nails. Using a small paint brush dipped in red food coloring, brush around the "cuticle" of each nail to create a bloody effect.

Bake until lightly browned and firm - about 12 minutes. Allow to cool completely before serving.

Eyeball Juice


I found some plastic eyeballs at a Halloween store. After running them through the dishwasher, I added them to grape flavored Crystal Light to create a spooky looking punch. 


These were all fast and easy recipes, but the result was a fantastic looking spread of creepy food. Putting it all together was so fun and I hope something here has sparked an idea for you and your upcoming Halloween events!

Tuesday, October 15, 2013

Zombie Brain Popcorn Balls

We are somewhat infatuated with zombies at our house. So with the recent season of The Walking Dead starting, some friends invited us over to watch the premier. It only felt right to bring a zombie-related treat. These popcorn brains were fairly easy to make (just a little messy) and they turned out pretty fun. This would be a great option to take to any Halloween party or potluck with relatively low cost and low time commitment.


Popcorn Brains
6 cups popcorn, popped and lightly salted
1 bag (10 oz) mini-marshmallows
3 T butter
1/4 t vanilla
red food coloring
small paintbrush

In large saucepan, melt the butter and marshmallows over med-low heat, stirring regularly. This process may take 5-10 minutes, but if you rush the marshmallow melting, your popcorn balls will turn out hard. Once melted, add vanilla and 2 drops of food coloring and stir until color is distributed. Stir in popcorn until evenly coated.

Form popcorn into tennis ball sized balls. This is the part that can be kind of messy. I attempted to do this with my hands using some butter to grease my fingers, but the mixture was way too sticky and would not bind together but rather just stuck to my fingers. My solution was to take a square of wax paper, spray it with non-stick spray, spoon the popcorn into the center and use the wax paper to form around the popcorn ball. Then I carefully peeled back the wax paper to release the popcorn ball.

You will want to form these into a somewhat flattened ball so they more resemble a brain shape. After forming a ball in the wax paper, I squished the ball slightly and pressed down along the center to create a minor valley between the brain hemispheres. This is the line where you will later paint your major dividing vein. Set the finished brains aside on another clean piece of wax paper to cool.

After forming all the brains, use a paint brush and food coloring to paint the major vein down the middle of the brain and then as many side veins as you want for effect. Mmmmm....BRAINNNZZZZ!


Sunday, November 1, 2009

Happy Halloween

I hope everyone had a fun Halloween. We had a good time putting together costumes and hanging out with friends. Roland decided to dress up as Michael Phelps. He had the swim suit, robe, flip flops, swim goggles, gold medals, and a small bag of "sticky icky" (oregano). It was pretty funny and everyone loved it. However, it never occured to either of us that when tricker treaters stop by your house, it makes the parents uncomfortable for a grown man to answer the door in tight shorts and a robe to give their children candy. Go figure!
*We sincerely apologize for any creeped out parents in our neighborhood. We really are not twisted people. Although I found the whole thing hilarious.
I decided to dress up as a fallen angel complete with black wings and halo. It was a fun night.


Witches & Mummies & Pumpkins, Oh My!

We finally got around to carving our pumpkins the night before Halloween. This was the first year that I used a pattern, and I loved it! Apparently Roland's mummy was more difficult than my witch though, because I was finished carving, roasted pumpkin seeds, cleaned the house, took a nap and got a massage and he was still carving. Ok, so maybe that's a little exaggeration, but it was quite the project. The pumpkins turned out awesome though. We were quite proud of ourselves.


ROASTED PUMPKIN SEEDS

If you haven't roasted pumpkin seeds before I would definately recommend it. It is so easy and makes a great snack. Plus if you are going to take the time to gut the pumpkins anyway you might as well make use of the filling.

Pumpkin Seeds from 1 or more pumpkins
Olive Oil
Salt

Separate seeds from the pumpkin filling. Rinse and drain the seeds. Coat lightly with olive oil. You can do this easily by putting the seeds in a bowl, adding a teaspoon or two of olive oil and stirring. Spread the seeds in a single layer on a cookie sheet coated with non-stick spray. Salt the seeds to your taste. Roast in oven at 300 degrees for 30-45 minutes, stirring every 10 minutes. Seeds are finished when lightly toasted brown.
Depending on your oven and pan the cooking times may vary. I did two pans at once and the darker one was done about 15 minutes sooner than the lighter pan.

Tuesday, October 20, 2009

Creepy Centerpiece

I wanted to put up some fall and Halloween decorations. I went to the dollar store to see what I could put together and came up with this idea. It is super easy, but I love the way it turned out. I had a glass pitcher and an orange placemat already. At the store I found some autumn-color flowers, a bag of potpourri to use as filler and some spider webs.


I poured the potpourri in the pitcher, arranged the flowers how I liked them and then used some of the spider web to stretch over the flowers. Add the plastic spiders and you have a simple, creepy centerpiece for your table. And, once Halloween is over I will be able to remove the spider web and still have a fall flower arrangement to use for a few weeks. Fun, simple and inexpensive. Love it.


I also found these bottle labels at the dollar store. I searched my house for some miscellaneous jars and filled them with water and food coloring, but I think I will have to look for some more authentic apothecary jars for next year to increase the effect. Still something quick and fun to put on a shelf. You could easily make some labels or print some off the internet if your local store doesn't have any available.